One of the most annoying aspects of Apple Aperture is that there is no API for RAW plugins. This means that you’re stuck with Aperture’s RAW rendering—and Apple has been slow to update support for the latest cameras. For instance, the Olympus E-P1/E-P2/E-PL1 series has been out since August, selling like hotcakes, but there is still no RAW support for these models, even though the E-30, which is supported, uses the same basic RAW file format.
Well finally my workaround seems to work for my satisfaction. Whee!
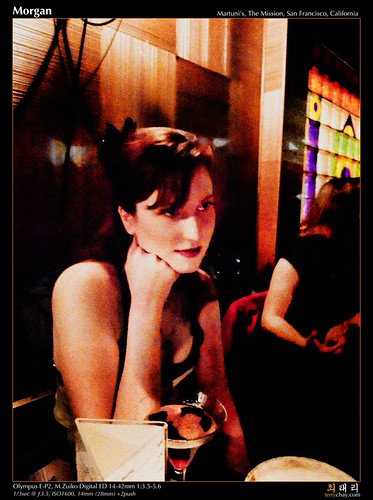
Martuni’s, The Mission, San Francisco, California
Olympus E-P2, M.ZUIKO Digital ED 14-42mm 1:3.5-5.6
1/3sec, iso 160, 14mm (28mm)
For those too lazy to read forward here is the step-by-step:
- Select images in Aperture and choose “Edit with…” Catapult.
- Read and save images in your favorite converter (for me and the E-P1 it is Adobe Camera RAW).
- Reimport images within Catapult and close the box.
The lack of RAW support is especially annoying for E-Px series, because the main purchasers of this camera are enthusiasts and pros who care about that camera, and the traditional workaround of roundtripping Adobe Camera RAW converted DNGs won’t work because the fine print of Apple’s DNG support shows that it only works with unconverted DNGs—and the new lensdata support of Adobe’s DNG specification generates converted DNGs. While, Adobe may disagree with me (and there is a good reason why they should), this is just the sort of moving-target that causes me to argue against converting to Adobe DNGs.
I use an obscure Aperture plugin called Catapult to roundtrip RAWs. I got Catapult so I could use RAW files that were converted by DxO Optics Pro. It works great for that.
In the past I tried this using Olympus Master and generated TIFFs but the EXIF information is removed and thus the date, in particular, disappears. Argh!

Zazie’s, Cole Valley, San Francisco, California
Olympus E-P1, M.ZUIKO Digital 17mm 1:2.8 Pancake
1/10sec @ ƒ2.8, ISO200, 17mm (35mm)
You can see the metadata is all gone :-(. The actual photo was taken on 10:28:50, not 22:40:32 as it says.
Catapulting your image
First you do *mumble* to put your images into stacks and generate selects.
Then you select all the selects that can’t be processed within Aperture and Edit with…Catapult.

Now, you open in your favorite RAW converter. Since Olympus Master doesn’t preserve EXIF and it’s sort of clumsy anyway, I prefer Adobe Camera RAW built into Adobe Photoshop CS4. For Olympus E-P1 images it has the added benefit of having distortion data for Panasonic GF-1 lenses so you can cross-platform your camera and still get benefits. You’ll note that post-processing metadata like B&W is lost.
That’s pretty easy to fix though:

Be sure to save them as PSDs because that’s a format that Aperture can recognize and it’s more compressed than TIFF (and has metadata). Also, might as well keep it in 16-bit and set your color space to Adobe RGB.

Reimport the image:

After reimportation, you will probably need to remerge the stacks and then can follow your regular Aperture routine and all is good. You may note that some Aperture metadata may be lost, so be sure to do things like geolocation and copyrighting after this part of the workflow. 🙁

Another alternative is, of course, Lightroom in that at least it is updated reasonably frequently.
You make a compelling argument for a separate applications for raw conversion and photo management though! If only there was a good DAM application for OS X…
Regards,
Rob…
I believe Lightroom supports RAW plugins (I know you can integrate DxO into Lightroom, for instance).
Lightroom works on the Mac, was originally written for Macintosh. I just don’t use Lightroom.
And… as if you had just asked for it, Aperture 3 is announced!
So I noticed. 🙂
My recent post LH-3 Lens hood for the 35mm F1.2 NOKTON
Ty
How do you get Catapult to load? I am having problems and you had mentioned in another post that you used some supplemental software.
I have the EP2 and see that Aperture 3 does not support it still. Interstingly if you read Kirk Tuck a real evangelist for the EP2, he feels that the JPEGs are so good, he is avoiding RAW. He also loves using the EP2 in a square format.
Once you have played with Aperture 3, give us your impressions.
I can think of a few issues.
1) All plugins are 32-bit (currently), you have to launch Aperture 3 in 32-bit mode to use Catapult
2) Database could be crapped out. Hold cmd-option and rebuild database (if you've moved to Aperture 3, that's not the problem).
3) Plugin prefs are busted. Go delete them (they're either in ~/Library/Application Support/Aperture or in ~/Library/Preferences).
Quick impressions on Aperture 3:
– Has way more than I expected, leapfrogged both Lightroom and iPhoto in features.
– The brush and presets are amazing (and going to create a 3rd party market for those things)
– Notebook users are going to love the new project export/import
– Wish they had RAW roundtripping (though I own Catapult)
– Wish they had support for external RAW plugins like LR
– Hope they open up an API that allows the editing tools to be extended by 3rd party (so that presets == actions)
– Can't wait until 64-bit plugins. This is a bit frustrating
– Wish they had "quick view" render from JPEG even if RAW is unsupported. Argh! So close you can taste it!
So how do you load Catapult? I am on Snow Leopard and I am having problems
Instructions here (+ compromises/limitations).
Here is a free app that does the same EXIFtool rewriting thing I mentioned above. Remember, it rewrites your RAW so you lose lens support.